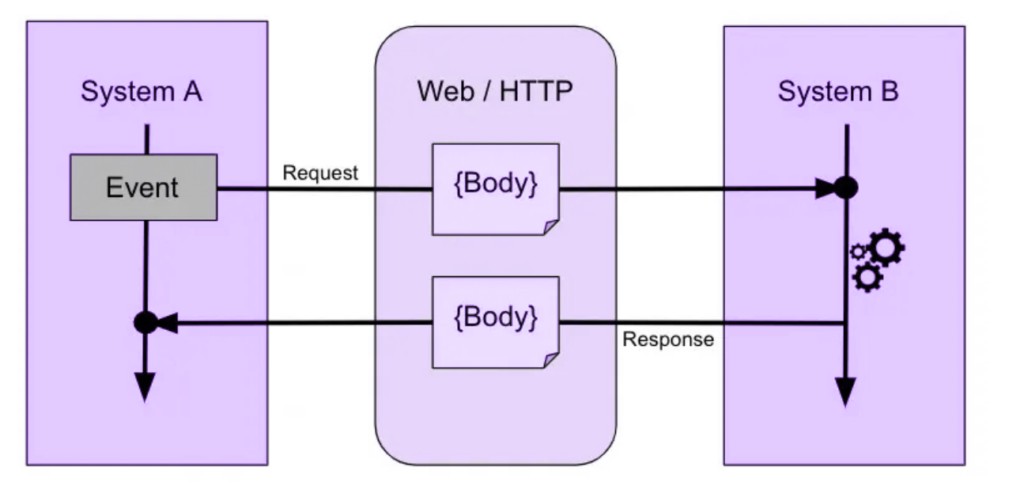
Webhooks serve as a dynamic communication mechanism between software systems, ensuring real-time data transmission without the need for continuous polling. In essence, they establish a streamlined method for one system to promptly notify another when specific events transpire. Unlike traditional polling, where systems repeatedly check for updates, webhooks allow for automatic transmission of information, fostering instant awareness and response.

These automated notifications are triggered by predefined events, such as a user sign-up or a completed transaction. By providing a designated URL endpoint, the receiving system, or subscriber, specifies where it wishes to receive these event-driven updates. The sending system, or publisher, then dispatches an HTTP POST request to this endpoint, carrying relevant event data — typically formatted in JSON. Subsequently, the subscriber processes this data, executing predetermined actions like updating databases, triggering workflows, or issuing user notifications. Webhooks, with their emphasis on immediacy and efficient event-based communication, have become integral in modern software development, enhancing the responsiveness and synchronization of diverse applications and services.
How to expose Webhooks from an OutSystems Application?
Creating webhooks in OutSystems provide a powerful mechanism for real-time communication between different systems and applications. Webhooks enable your OutSystems applications to send and receive data automatically when specific events occur, facilitating seamless integration and timely updates. With webhooks, you can streamline processes, enhance automation, and improve the responsiveness of your applications.
Webhooks are based on an event-driven architecture. You define specific events in your application (e.g., a new record creation, an update, or a user action), and the webhook is triggered when these events occur.
Let’s build a Pub-Sub architecture in OutSystems using Webhooks
- We will build a simple reactive web application in OutSystems to create an employee record.
- Let us assume that for every new employee created, we want to trigger a notification to an external system.
- To achieve the above we will use the Webhook Producer Forge component available on OutSystems forge. This will act as the source/producer to facilitate the webhook trigger.
- To simulate the Consumer we will use Celigo Integrations Platform to receive the webhook Payload.
Note: Any other application can be used as a consumer.
Steps
Create a simple Employee OutSystems Reactive web application and bootstrap it using OutSystems AI Autogenerate capabilities.


Install the Webhooks Producer Forge component from Outsystems Forge.

Add this component is added as a dependency via manage dependencies.
This component has various submodules and a back office application where the webhook configurations and related data are stored.
Once imported the component will be available in the server actions tab under logic with the below modules.

i) Under Authentication we can configure various authentication methods like OAuth, Basic etc as well as configure custom headers and generate secrets and access tokens
ii) The webhook signature can be validated by using the ValidateWebhookSignature server action.
iii) The actions under Webhooks Producer enable us to Define webhook events and trigger them as and when required in our application.
Now let’s wire all of the above and create a Pub-Sub architecture
Let us get started by creating an event using the Webhooks Producer Module
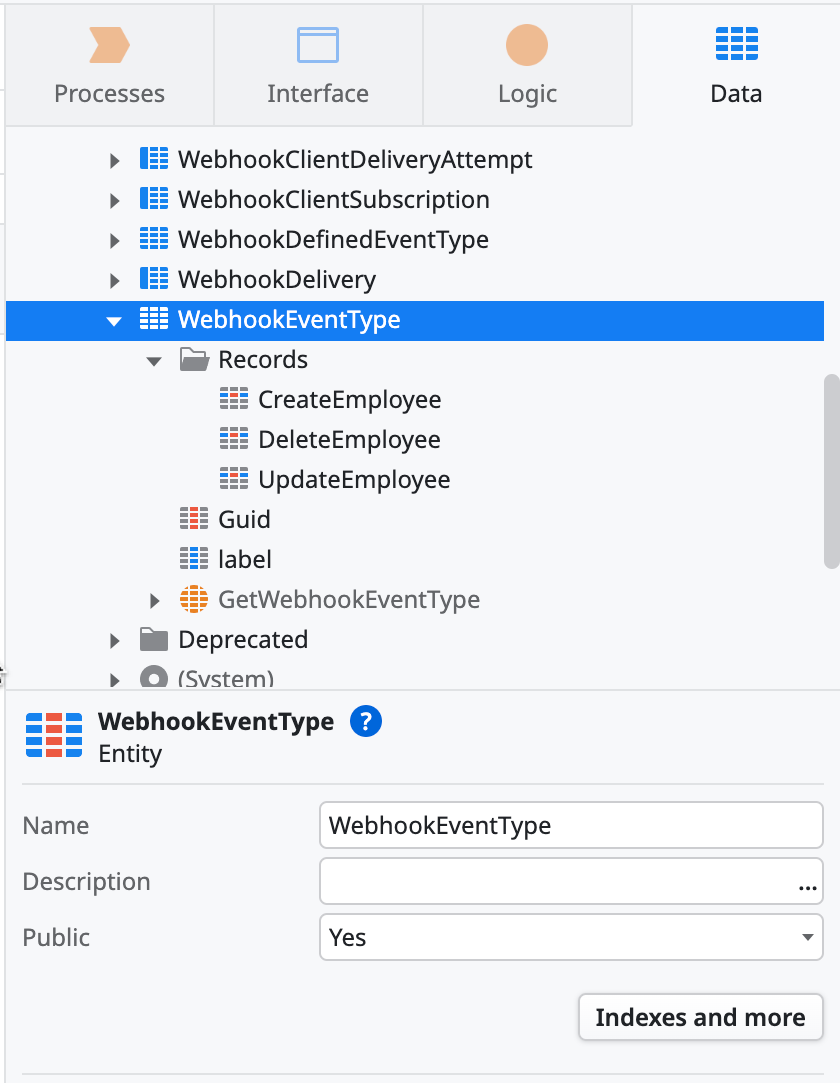
Open the Webhooks Producer forge component and go to the static entity name WebhookEventType under the Data tab and add records for the the events you are expecting to trigger as seen below.

Create a screen on the demo application and use the value from the static entity to create a Webhook Event as seen below.


Create a Consumer (Ex: Celigo) to consume the payload generated by the above events once they are triggered in an OutSystems Application

Let us now configure the Subscriber(listener) URL and trigger it whenever a new employee is created.
i) Copy the public listener URL from Celigo as seen below

ii) Go to the Webhooks Producer application and open the webhook module in the browser and configure the webhook as shown below.

The Webhook configuration step allows us to set additional configurations as indicated below:
- Authentication: This module supports two types of authentication for webhook listener URL’s Basic authentication and OAuth authentication as seen below


2. Retry Policy: This policy defines the method to retry the call to the Subscriber incase the call to the configured url fails. There are two types of retry policies.
i) Retry with Linear Backoff – A linear retry policy will attempt to resend the request n number of times for a certain interval. As a best practice, the minimum interval is 3 and the maximum retry count is 60 seconds.

ii) Retry with Exponential Backoff – If your initial attempt to send a webhook fails, you don’t want to keep hammering the server incessantly. Instead, you wait for a brief moment and then try again. If it fails the second time, you wait a bit longer, and the cycle continues.

3.Retention Policy: This policy defines how long the webhook activity history will be retained for logging/analysis purposes. There are two retention policies namely Retain history but discard payload and Retain history and payload as seen below


After the above steps are configured as per your requirement you should see a new webhook created on the dashboard as seen below:

Click on the webhook URL and go to the Webhook details page to subscribe to the events we created in the webhooks producer. In the below example, the Create Employee Webhook has been subscribed to. Hence, whenever a new employee is created and the corresponding webhook is triggered a request payload will be received on the Webhook listener.

Next, we have to trigger the webhook event from the Reactive Outsystems application which in turn will send the desired payload from the producer as seen below.

{
  "Id": 10,
  "Firstname": "Stan",
  "Lastname": "Lee",
  "DOB": "1978-02-15",
  "Gender": "Male"
}
Note: Although the Webhooks Producer Forge component is a Traditional Web app component it will work with Reactive Applications.
Below is a detailed end-to-end demo of the working application :
About the Author
Joshua Salema is a Senior Practice Lead – Digital at Zimetrics, where he drives the strategy, growth, and delivery of cutting-edge digital solutions. With deep expertise in architecture and technology leadership, he ensures the design and implementation of secure, scalable, and future-ready systems that align with business goals. Joshua partners with clients and cross-functional teams to translate vision into execution, fostering innovation while upholding architectural best practices. Beyond his core role, he is passionate about mentoring talent, shaping high-performing teams, and contributing to the broader digital technology community through thought leadership and industry engagement.
